Introduction
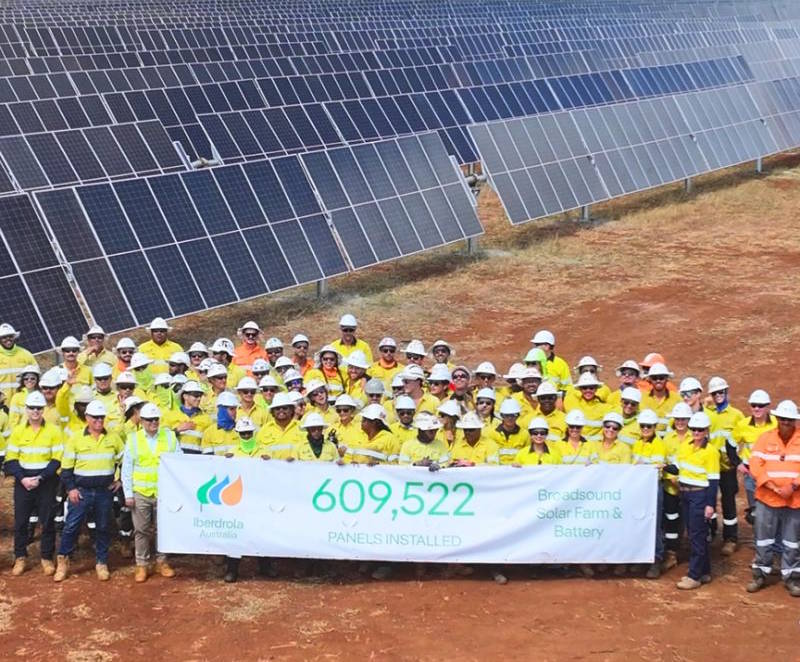
Building a large-scale solar farm is a complex engineering feat that requires meticulous planning and execution. In a recent milestone, a 377 MW solar and battery project successfully installed its last of 609,522 panels, along with more than 91,000 piles and 7,006 solar trackers. This step-by-step guide breaks down the essential phases of constructing such a massive renewable energy facility, from site preparation to final commissioning.

What You Need
- Project Plan: Detailed engineering designs, permits, and environmental assessments.
- Solar Panels: Approximately 609,522 high-efficiency photovoltaic modules (for a 377 MW capacity).
- Mounting Structures: 7,006 solar trackers (single-axis or dual-axis) and 91,000+ support piles.
- Foundation Equipment: Pile drivers, concrete mixers, and earthmoving machinery.
- Electrical Components: Inverters, transformers, wiring, and battery storage system (if integrated).
- Workforce: Engineers, technicians, construction crews, and safety personnel.
- Safety Gear: Helmets, harnesses, gloves, and high-visibility vests.
- Testing Tools: Multimeters, thermal cameras, and commissioning software.
Step by Step Installation Guide
Step 1: Site Preparation and Survey
Begin by clearing the land of vegetation and leveling the terrain. Conduct geotechnical surveys to determine soil stability and pile depth requirements. Mark pile locations according to the tracker layout plan using GPS and laser levels. Obtain necessary environmental and construction permits before any digging.
Step 2: Install Foundation Piles
Drive or drill more than 91,000 piles into the ground at precise intervals. Each pile must be inspected for vertical alignment and depth consistency. Use hydraulic pile drivers for speed and accuracy. Allow concrete piles to cure if cast in place; steel piles may require anti-corrosion coating.
Step 3: Assemble and Erect Solar Trackers
Mount the 7,006 solar trackers onto the piles. Each tracker consists of a steel frame, rotation mechanism, and motor. Follow manufacturer guidelines for torque specifications and electrical connections. Use cranes or elevated platforms to position the tracker frames safely. Test tracker movement to ensure smooth rotation from east to west.
Step 4: Install Solar Panels
Lay out the 609,522 solar panels across the trackers in rows. Each panel is typically 2–2.5 m² and weighs 20–25 kg. Attach panels using clamps and bolts, ensuring proper grounding and spacing. Connect panels in series and parallel strings to achieve the desired voltage and current. Secure all fasteners and verify physical stability against wind loads.
Step 5: Wire Electrical Systems
Run DC cables from each panel string to combiner boxes. From there, route cables to central inverters or power conversion stations. Install AC wiring, transformers, and switchgear to connect to the grid. For a hybrid project, integrate the battery storage system with its own inverters. Label all cables and follow color codes for safety. Use cable trays and conduits to organize and protect runs.
Step 6: Test and Commission
Perform insulation resistance tests on all cables and circuits. Energize the system in stages—first the inverters, then the trackers, and finally the battery bank. Check panel output under sunlight using power meters. Adjust tracker angles for peak production. Run commissioning software to verify monitoring and control systems. Conduct a 72-hour continuous operation test to identify any issues.
Step 7: Final Inspections and Handover
Inspect all mechanical and electrical connections for compliance with codes. Document as-built drawings and test results. Train the operations team on maintenance schedules and emergency procedures. Submit final reports to the utility and regulatory bodies. Officially transfer ownership and begin commercial operation.
Tips for a Successful Solar Farm Installation
- Plan for weather delays: Schedule panel installation in dry seasons to avoid mud and electrical hazards.
- Prioritize safety: Use fall protection when working on elevated trackers and ensure all workers are trained in lockout/tagout procedures.
- Implement quality control: Inspect every 10th pile and every 5th tracker for alignment to catch errors early.
- Optimize logistics: Stage panels and trackers in sequence to minimize double handling and reduce damage.
- Use remote monitoring: Set up IoT sensors to track panel performance in real time after commissioning.
- Engage local workforce: Hire skilled labor from the area to reduce accommodation costs and build community goodwill.